
5 exercises to help release your tailbone for an easier birth, a healthy pelvic floor, and reduce tailbone pain
‘The secret of an easier birth - and a healthy pelvic floor - lies under the tail’.
This is an (adapted) quote from Dr Francoise Freedman, a pioneer in the field of perinatal and women’s health yoga, and founder of Birthlight, with whom I was privileged to train and now co-teach.
Ok, let me maybe first start by saying that of course there are more than one ‘secret’, or element, to help make birth easier, and to ensure good functionality of the pelvic floor. And I’m trying to share any of those in these pages, and in my classes!
But still, this one is an important one, and yes, it’s all to do with your tailbone (or coccyx) and its ability to untuck/release.
Why freeing and releasing the tailbone matters
To make birth easier - especially during the pushing phase - we want our tailbone to be able to move out of the way, and our pelvic floor to release completely, so that we can create the biggest space possible for baby to be born, with no or limited damage to our pelvic floor too.
Similarly, for our pelvic floor to function well, at any time of our life, we want it to be able to release completely (as well as contract). We want elasticity.
Because the pelvic floor attaches to the tailbone, the two are intrinsically linked.
If our tailbone is ‘stuck’ or tucked under a lot (like when we sit on squishy sofas… like, a lot of the time!), the pelvic floor will get tight.
And if our pelvic floor tends to be tight, it can create tension in the tailbone, leading to tailbone pain (very common in pregnancy and postnatally) and/or an inability to release it, and so find that much-needed space for baby during the birth process.
5 exercises to free your tailbone and release the pelvic floor
1 - Watch how you sit
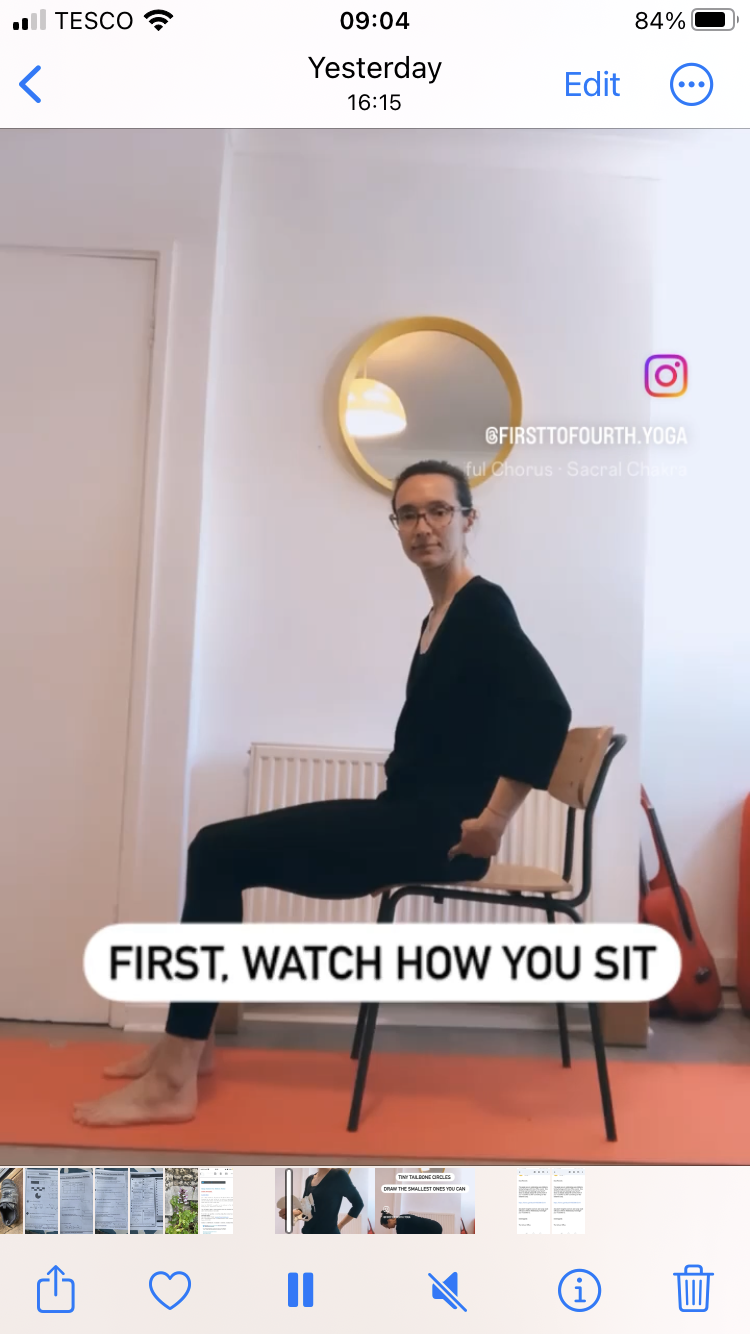
Tip number one is really to watch how you sit because most of us tend to sit on our tailbone, with the pelvis tucked under, which creates more pressure on the tailbone and creates tightness in the pelvic floor (it’s also not great for posture, heartburn and baby positioning!).
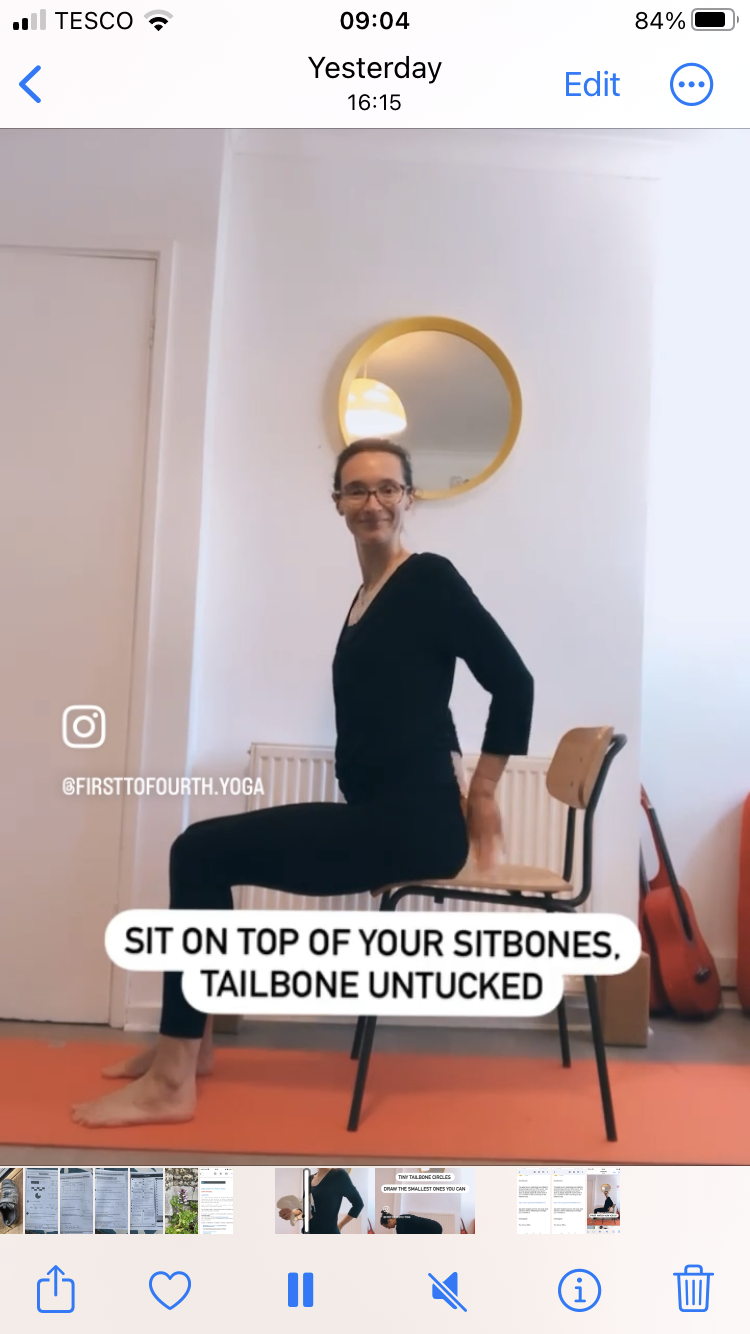
What we want to do instead is to sit on top (and ever so slightly forward) of your sitbones (the pointy bones under your bottom) with the tailbone free of pressure.
Modern squishy furniture isn’t our best friend here as it encourages us to slouch, so try a harder seat or even better, to sit on a birth/gym ball for at least some of the day if you sit at a desk all day, for example.
There are also wedge cushions with a little gap for the tailbone which encourage a really good posture and avoid us putting pressure on the tailbone.
2 - Micro movements on all fours
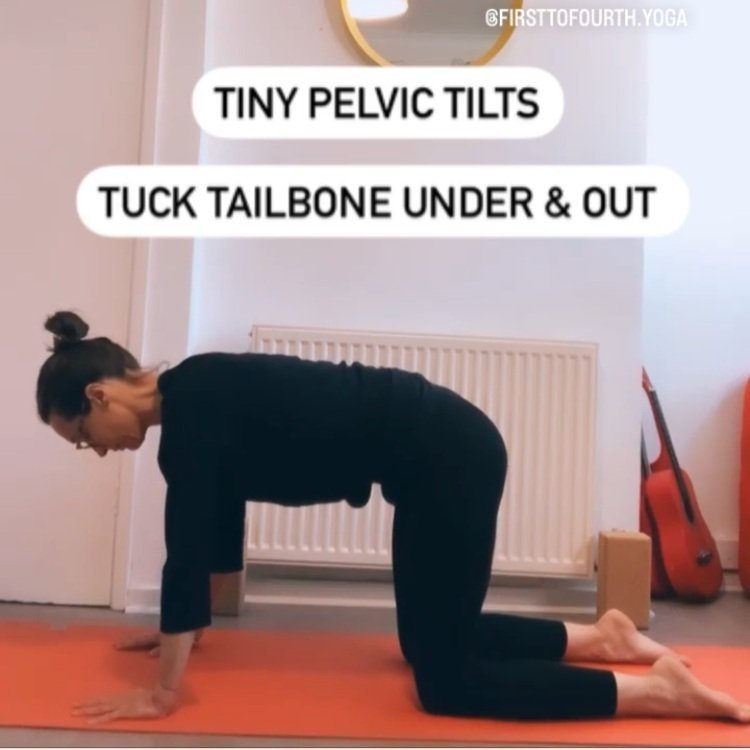
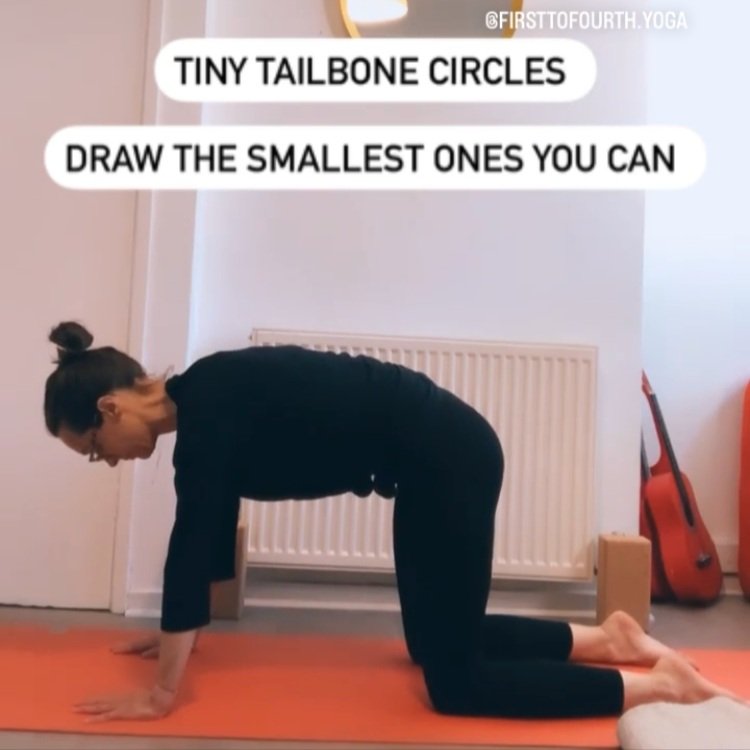
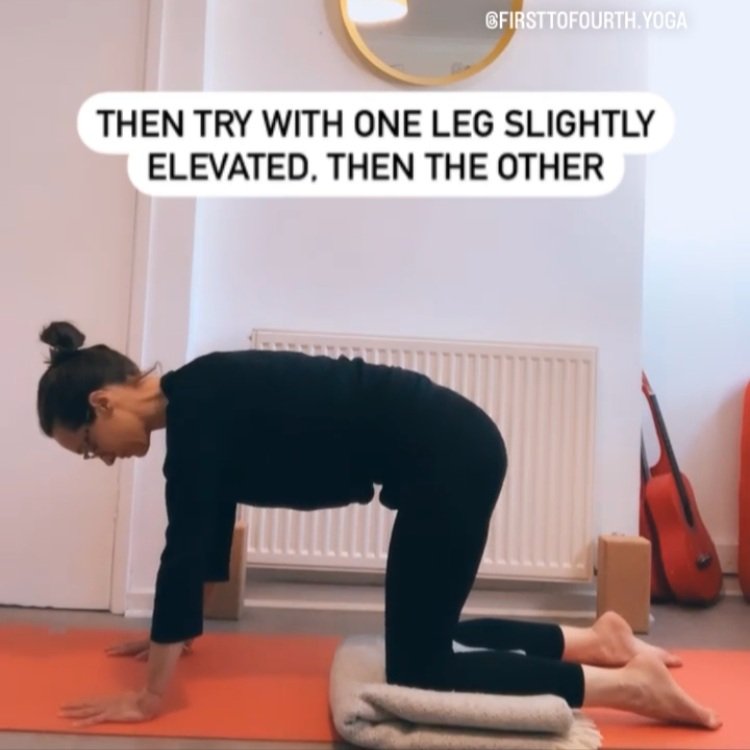
From an all fours position, bring your awareness right under your tailbone and explore tiny movements - the smaller the better. Try tiny tilts (curling the tailbone under and back out) focusing on the contrast of the tuck and the release. Then try tiny circles, one way then another, as if you were trying to draw the letter O with your tailbone.
For all movements, try to keep the torso as neutral as possible to direct the movement deep into the pelvis.
To help create a bit more ‘wriggle’ you can elevate one knee with a folded blanket or yoga block - try it on both side (one side at a time).
If you suffer from tailbone pain, keep the tucking under really small if you feel that intensifies the pain.
3 - Happy baby pose

If it’s comfortable for you to lie on your back, happy baby pose is great to help stretch and release the pelvic floor.
Try to lie with your sacrum (the flat part at the back of the pelvis) flat on the floor, to help untuck the tailbone. If that means you can’t reach out feet with your hands (which is absolutely fine!), then use a scarf or belt. You can also explore bringing only one leg up at a time.
Breathe deeply, consciously releasing your jaw.
4 - Puppy pose with toe taps
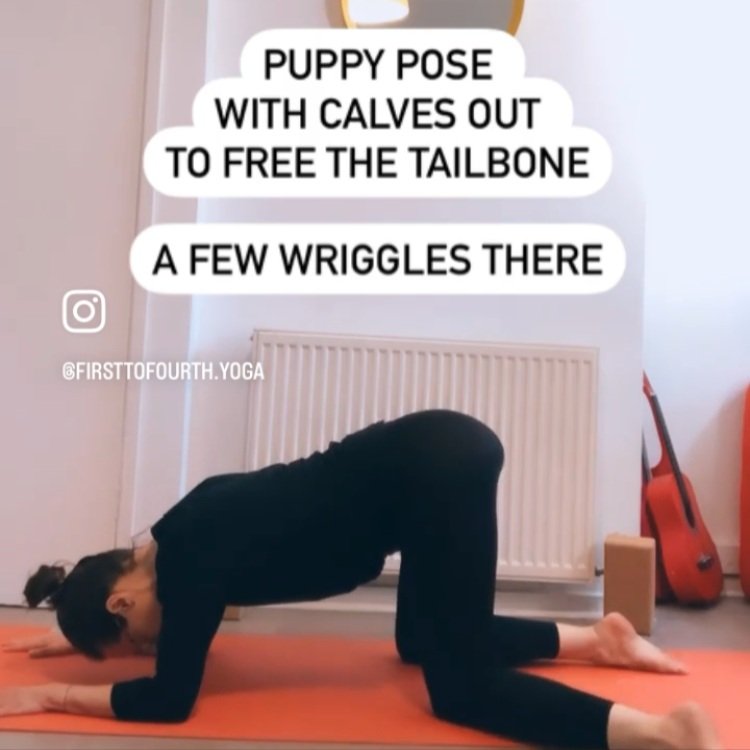
Come to this puppy pose / knee-chest position - a position that can actually be very useful during labour so great to practice.
Starting with shins parallel, tap one foot out and away, then back to centre, then repeat with the other leg, alternating sides. If comfortable, you can stay for a couple of breaths in the ‘toe out’ position, or even with both legs out at the same time.
Try wagging your tail in that position, then wagging again with both legs back to parallel to fully release.
5 - Pelvic floor release exercise
Settle yourself in the same knee-chest position as above; taking your bottom up in the air helps unload the pelvic floor from the weight of baby and our organs, and disengage the glutes which often want to get involved when we do pelvic floor work. You can stack your firsts to make a ‘pillow’ for your forehead, or grab a couple of cushions, to get more comfortable.
In this exercise, we focus on the back of the pelvic floor (the stronger part). The aim is to develop an awareness of how the pelvic floor can both lift and release, and to increase our ability to release/relax, moving with the breath so create/restore elasticity in the pelvic floor.
First, bring your awareness to your breath, and then to that area under the tailbone and round your anus/back passage. As you inhale, squeeze and lift up your back passage as if trying to hold in a wind and bring it up, then as you exhale, release down and out completely, sighing your breath out to free the jaw as well.
Next inhale, do nothing, and next exhale, see if you can release down and out a little more. Take a full round of breath doing nothing at all, then repeat the sequence a few times.
You can repeat this exercise several times a day, especially if you have tailbone pain, know you suffer from pelvic floor tightness and/or are getting nearer to birth!
If you would like to explore many more practical birth-changing tools - positions, movements, breath & release techniques - to help make birth easier, have a look at my Practical Birth Skills workshop, which runs quarterly online, or available as a bespoke 1-1 session for you and your birth partner.
And if you need further help with your pelvic floor, we explore this key part of our women’s health in all of my classes, whether in-person or recorded!